
How to change hotkeys in Ozeki Voice Keyboard
This guide demonstrates how to change the keyboard shortcuts used by Ozeki Voice Keyboard. You can reassign the default hotkeys for voice transcription and the AI assistant to any key combination that fits your workflow, avoiding conflicts with other applications on your system.
Steps to follow
- Open Ozeki Voice Keyboard and locate the tray icon
- Open the keyboard shortcut settings
- Record a new key combination
- Save the shortcut settings
How to change hotkeys video
The following video shows how to change the hotkeys in Ozeki Voice Keyboard step-by-step. The video covers locating the tray icon, opening the keyboard shortcut settings, recording a new key combination, and saving the configuration.
Step 1 - Open Ozeki Voice Keyboard and locate the tray icon
Ozeki Voice Keyboard runs in the background and can be accessed through the Windows system tray in the bottom right corner of your taskbar. If the icon is not visible, click the arrow to expand the hidden tray icons (Figure 1).

Step 2 - Open the keyboard shortcut settings
Right-click the tray icon to open the context menu and select Shortcuts to open the shortcut configuration window (Figure 2).

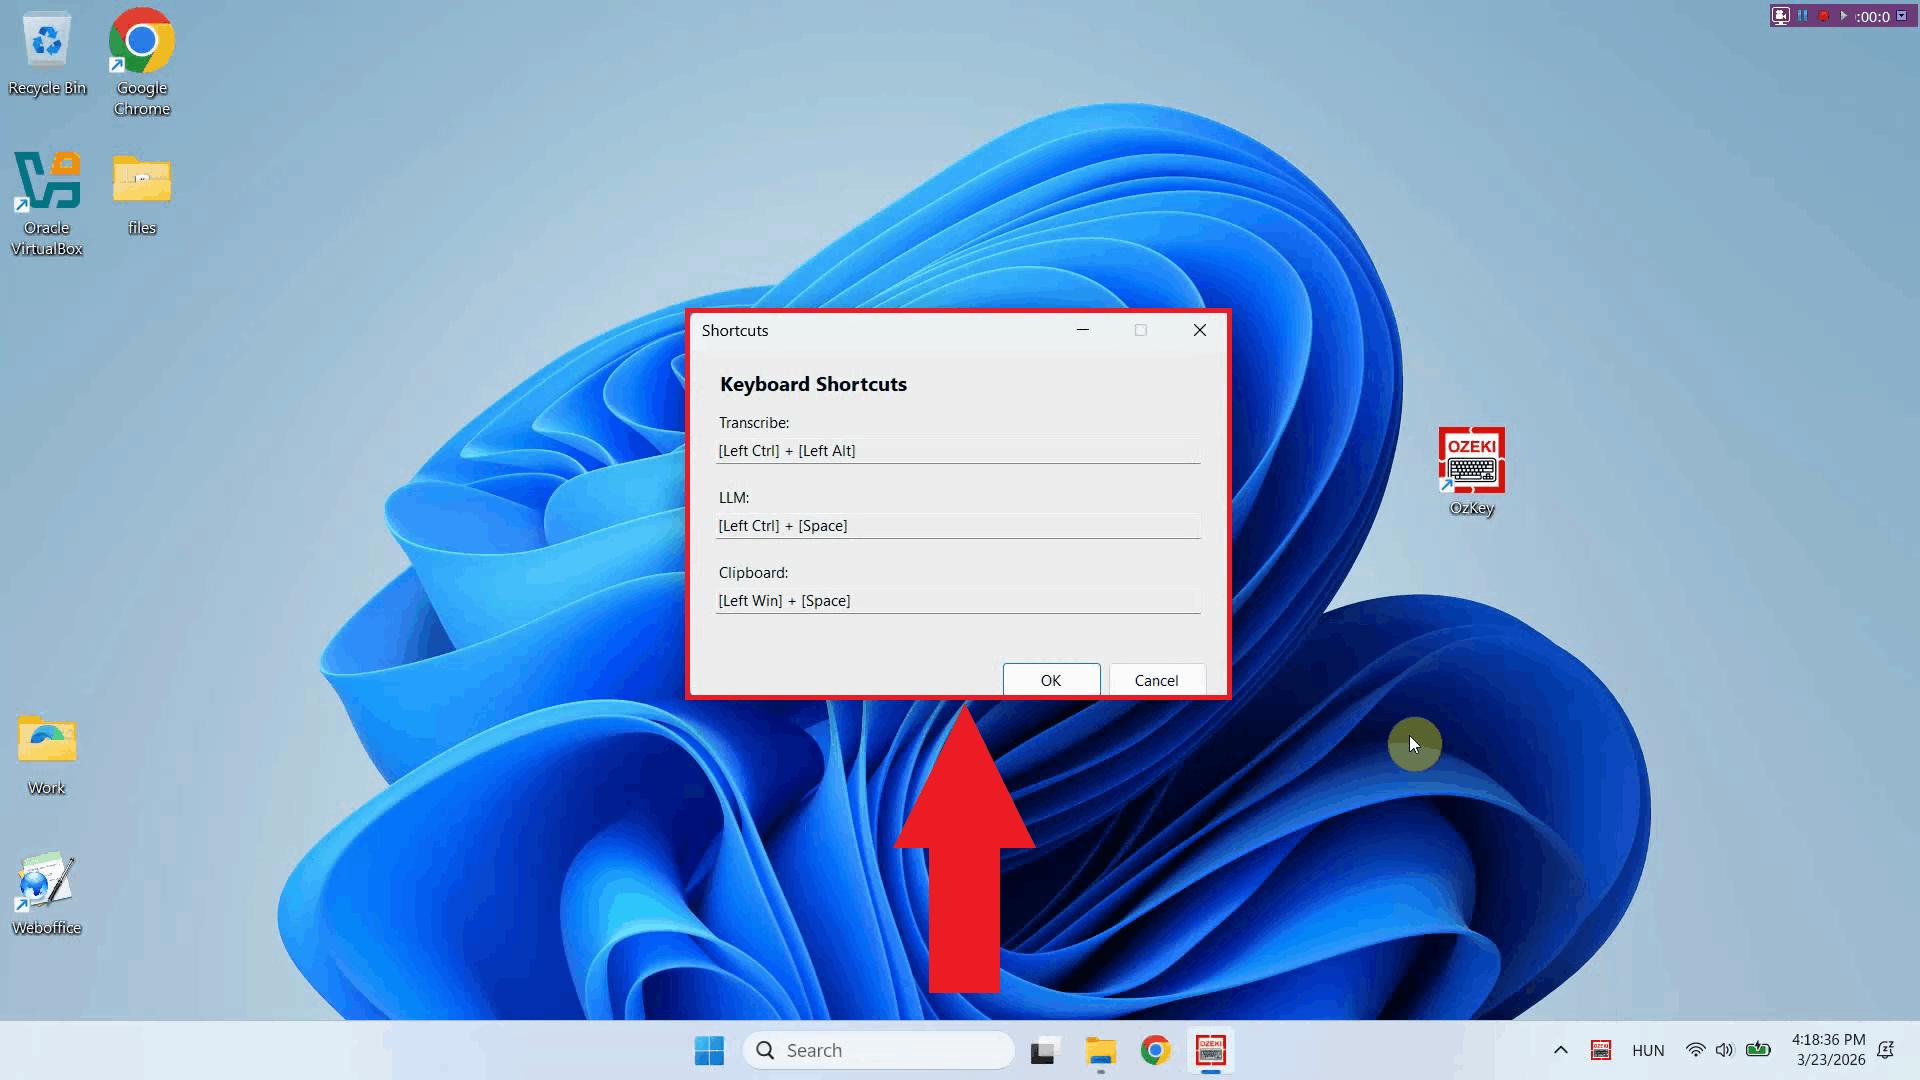
The keyboard shortcut settings window displays the currently assigned hotkeys for each available action, including voice transcription and the AI assistant. From here you can record new key combinations to replace the defaults (Figure 3).
Step 3 - Record a new key combination
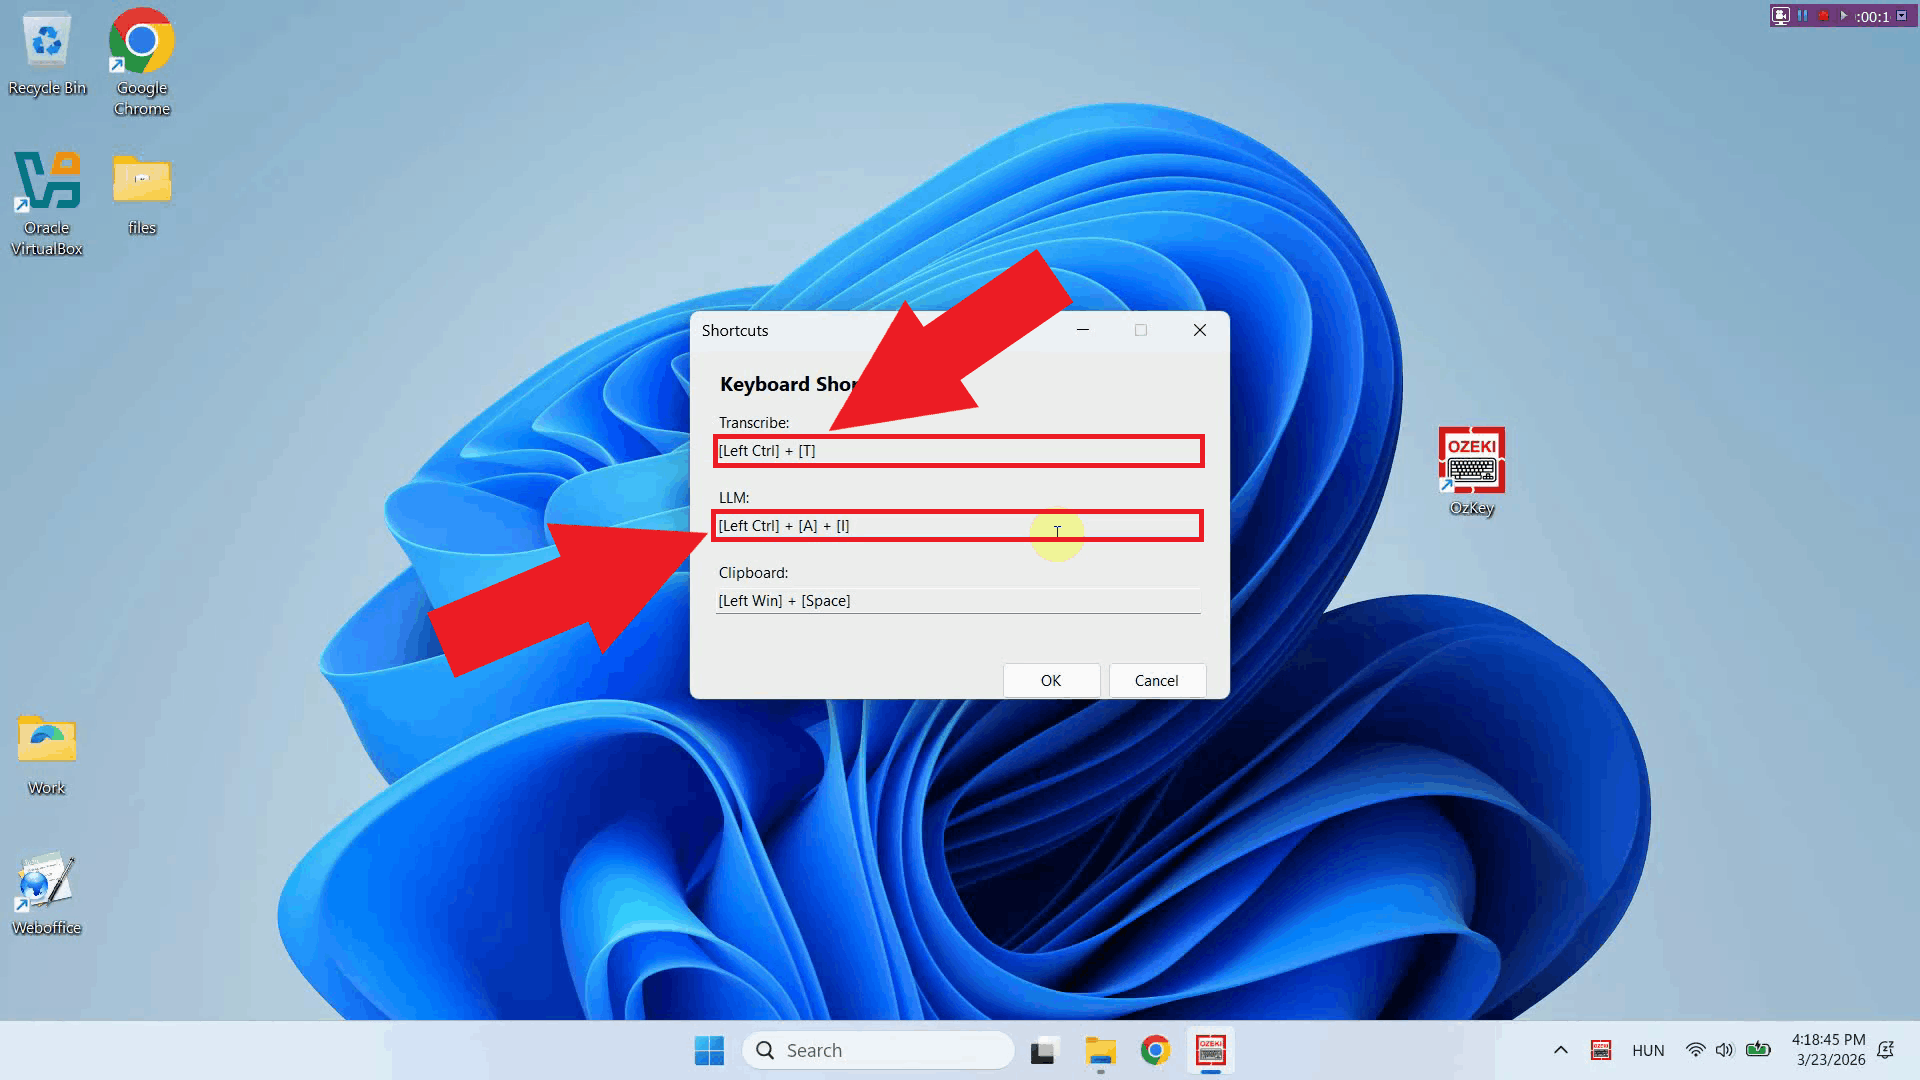
Click the input field under the action you want to reassign then press the key combination you want to use. The window will register the keys you press and display the new combination in the field (Figure 4).
Step 4 - Save the shortcut settings
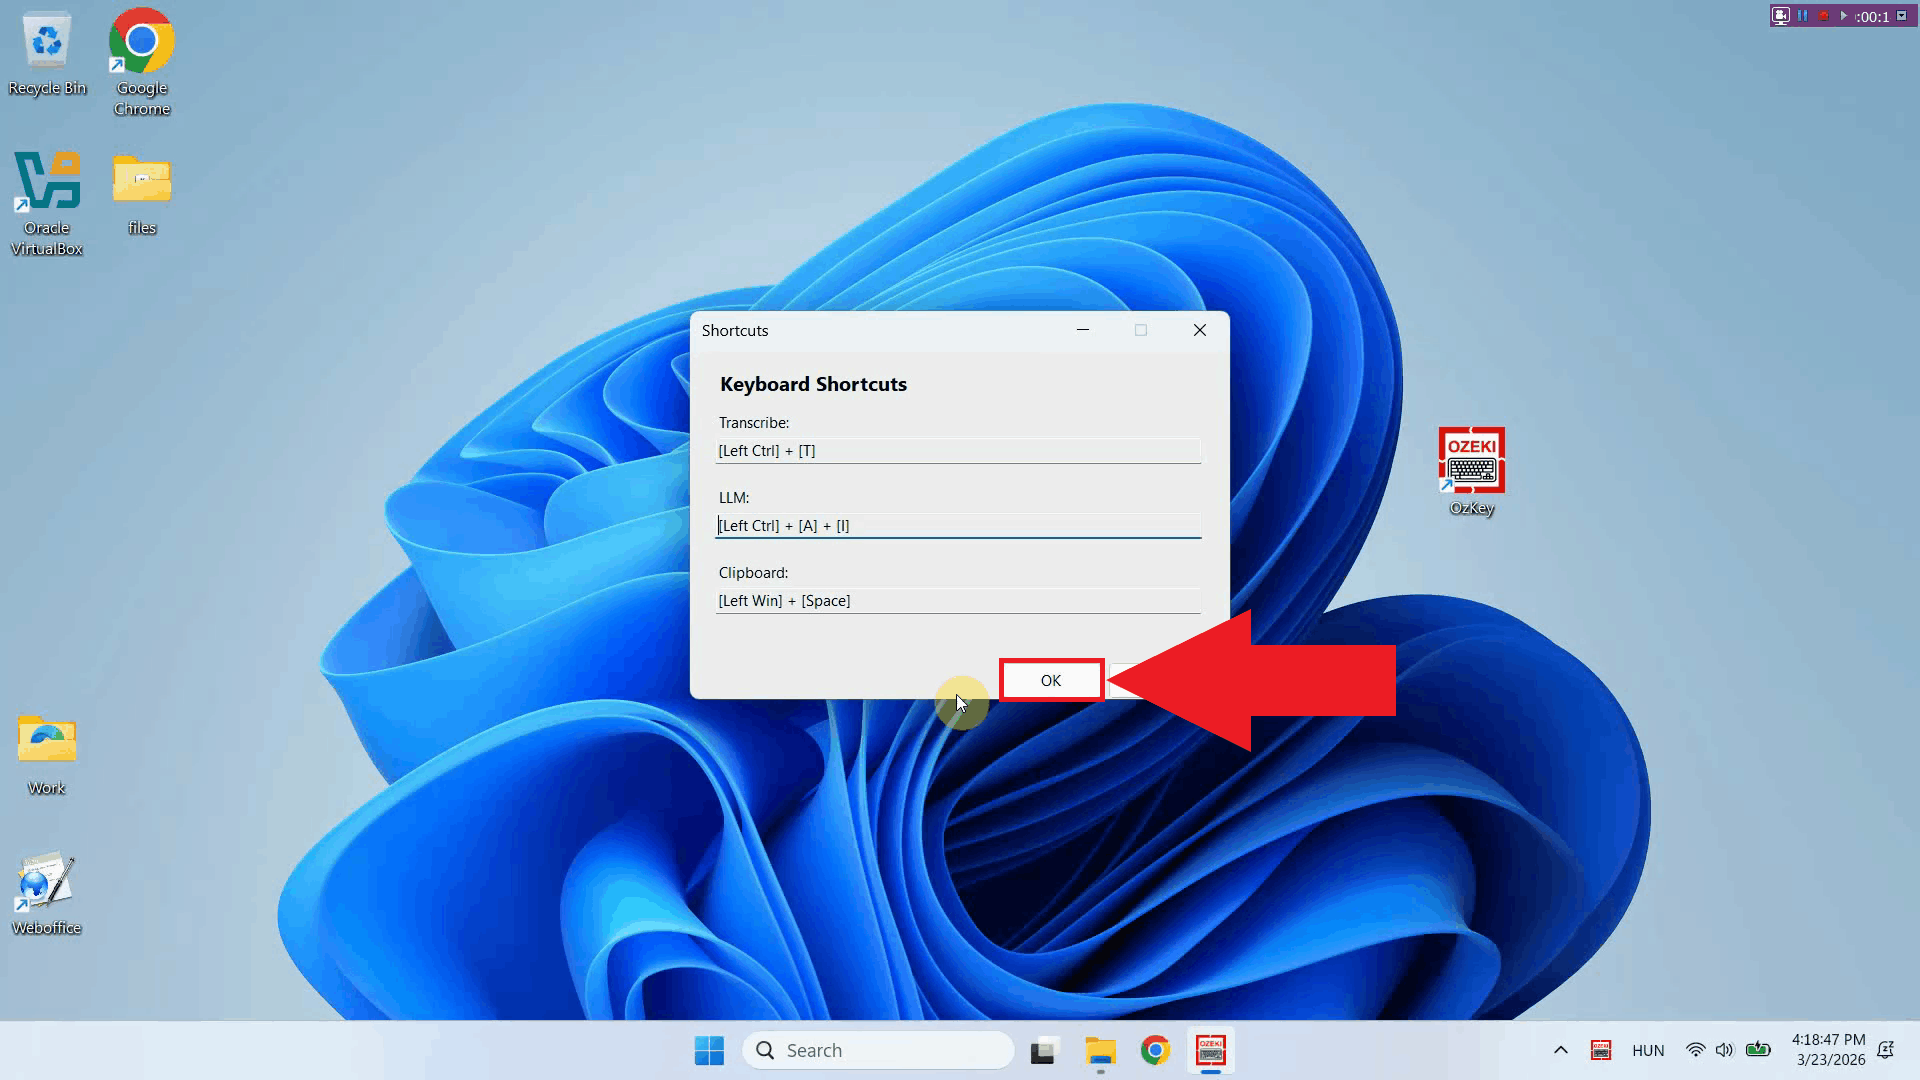
Once you have recorded your preferred key combinations, click OK to save the configuration. The new hotkeys will take effect immediately (Figure 5).
Conclusion
You have successfully changed the hotkeys in Ozeki Voice Keyboard. The new key combinations are now active and ready to use. You can return to the keyboard shortcut settings at any time through the tray icon context menu to reassign them again if needed.